Posts

Showing posts from December, 2015

DIY December - Day 10 - Arm knitting an infinity scarf

Image
Introduced in 2014 it became quite the trend in 2015: Arm knitting. Here's the most used video tutorial. Things to keep in mind: - The first time you arm knit you might take 1 or 2 hours to make a scarf. Once you get the hang of it, it goes a lot quicker. - Take a bathroom break before you cast on. Not very handy to bring all that knitting to the toilet!

DIY December - Day 9 - Log pillow for Christmas fire or Twin Peaks lady

Image
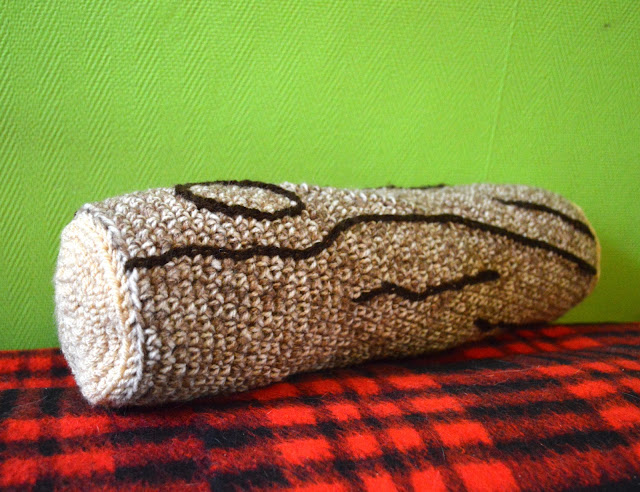
Having been at a Twin Peaks party a couple of weeks ago I realized that my life was missing a log pillow. (The hostess of the party had one!) So I was thrilled to find the free log crochet pattern on the Club Geluk website ! The pattern is in Dutch, but I will explain some adaptation I made, and as a bonus: how to make it into a pillow. I used 100 grams of light brown yarn (it was actually a variation yarn, but that worked well). 50 grams of beige and 50 grams of dark brown yarn. All yarn DK / light worsted (usual advice would be needle size 4). I used a crochet needle 3.5 mm to get a close firm stitch. The recommended 43 chain stitches (light brown yarn) cast on gave me a circle of 9 1/2 cm diameter. I closed the circle and knitted 55 rows to get a 39 cm tube. I did make a small change to the pattern in the 2 end circles of the log (beige yarn). As recommended I did cast on 8 stitches in a magic circle. And then increasing each round following in the pattern. However: I did

DIY December - Day 8 - Club Geluk - Everything is knittable

Image
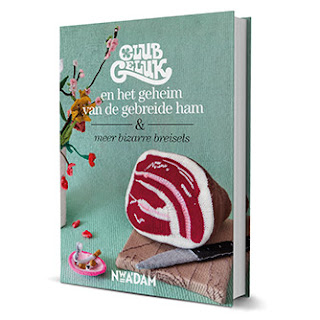
Last winter the Dutch shopping chain HEMA used a lot of knitted items in their holiday season promotions. There were knitted champagne bottles, a cat, food, yes, even a ham. All this was knitted by Club Geluk (= Club Happiness). On their website the actual items are for sale, but also Christmas NYE cards and a spicy calender. But most of all, a big hooray for the Dutch knitters, the knitting patterns are now available in a book: Club Geluk Boek I didn't get the book yet, but a friend of me bought it and confirmed it was full of patterns that were unlike anything she had seen before. On the Club Geluk website you can also find free crochet patterns (in Dutch). Among those a crochet log. The pattern suggests using a cardboard roll as filling. But I made a pillow filling for it. Which will be DIY December Day 9, otherwise I'll never catch up ;-)

DIY December - Day 7 - Meow Mitts by TinyOwlKnitsPattern

Image
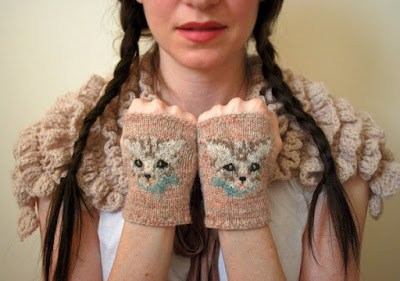
More mittens to make! You just got to love these Meow Mitts by TinyOwlKnitsPatterns . I know I do =^x^= Pattern available in her Etsy shop. Pattern: Meow Mitts by TinyOwlKnitsPatterns And if you don't like cats - hey wait, what are you doing on this blog then? -  she also sells patterns with bunnies, birds and butterflies, among others.

DIY December - Day 6 - Pieces of Eight Mitts from Knitting And So On

Image
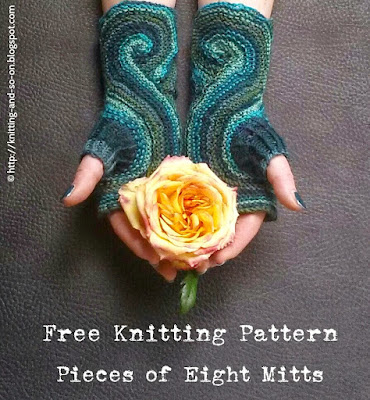
The free pattern for these fingerless gloves is available on the blog Knitting And So On . Aren't they amazing? I have never seen anything like it. I can't wait to knit them! Free pattern on Knitting and so on

DIY December - Day 5 - Quick-to-make Lentil Spread for a healthy sandwich

Image
For the 5th #diydecember (I'll catch  up, I promiss!) I'll share one of my favourite recipes. And it is super easy as well! As bread and cracker spreads go I never was much of a sweet tooth. But I really wanted to cut down on my cheese consumption a couple of years ago. Now there are a lot of vegetable spreads available in the shops, but they tend to be quite expensive. So I created my own: Quick-to-make Lentil Spread Bring half a liter of water with vegetable stock to a boil.  Add 150 gram of red lentils . When the water is back to boiling lower the fire and put the lid on. Leave smothering at a low heat for about 10 to 15 minutes. Do occasionally stir and make sure if there is still enough water in the pan. Turn of the heat. If there is too much water, pour away the access. Leave the pan standing with lid on. In the meantime cut an onion in fine pieces en squish 3 parts of garlic (smoked - optional). Fry the onion. Add the garlic and spices as

DIY December - Day 4 - Etsy Shops Leiden guide to getting crafty

Image
A belated Day 4, as I had no time to post yesterday. Today I am sharing 11 items from Etsy to spark your creativity. All these shops are from the Leiden area. So whether you want to stamp, crochet, bead or draw...check out our Etsy Leiden team page for materials, PDFs and kits. PDF crochet pattern for bunting by HaakmaarraakNL PDF knitting pattern for Superhero Hat by MissMinoes From Leiden. Patterns & DIY. curated by From Leiden with Love on Etsy

DIY December - Day 3 - Save the socks. Make armwarmers.

Image
A couple of years ago I made a pair of armwarmers out of socks with holes. This project will be today's DIY idea. It was a busy day at work, so it's a bit of a filler tutorial. ;-) When socks start to get holes you might try out to mend them at first. But sometimes the quality of the material is just not really up to being used that intensely. As a shop assistant I am on my feet all day and the soles of my socks sometimes wear very thin. And there's simply nothing left to mend. When this happened to a few pair of knee length socks (poor quality, but I fell for the stripes) I decided to make them into armwarmers. First you cut the sock, just above the ankle. If you have an overlock machine you can sew the edge with that. I don't have an overlocker, so I decided to use a zigzag on the cutted edge. On the yellow/black pair I sew a stretchy lace ribbon along with the zigzag. On this pair the cut edge was the hand side. On the black/white pair the top of th

DIY December - Day 2 - Origami Fröbel Star

Image
At the Etsy Craft Party in June we worked with 3 origami DIYs. I had promised to share them all 3 on this blog. But after the first one I went to Italy, then we got 2 cats...and now it is December. Still: the perfect time to make a Christmassy Paper Fröbel Star ! Here's how it is done: You need 4 strips of paper, each at least 25 times as long as it is wide. Mine were 1" (2.5 cm) wide and at least 25" (62.5 cm) long. Vouw 4 stroken in elkaar. Interlocking, dus bijvoorbeeld beide gele einden door de rode heen steken. Fold the 4 strips interlocking together. So both yellow ends are weaved in the red strip. Vouw de bovenste stroken 1 voor 1 dubbel over het vierkantje heen. Fold the upper strips 1 by 1 over the square. Steek de 4e strook onder de eerste door. Stick the 4th strip under de first one. Vouw een strook in een puntje. (Maakt niet uit met welke je begint.) Fold a strip into a point. (It doesn't matter with which you start.) Kl

DIY December - Day 1 - Sharing fun tips for a handmade jolly season.

I'm ba-a-ack! Back on the blogtrain, that is. Last months I have been busy, and so often thought: oh, this is something I'd like to blog about. But somehow just the thought of sitting at the PC made me tired. So, maybe one day I will tell you about the trip to Terschelling, the sewing lessons, the Westknits KAL (knit-along). But not today. This month I will share on a daily base lovely DIY ideas, kits, patterns, recipes and inspirations that will make you want to jump out of your chair and get creative. Last weekend I started to hang up some Christmas decorations. Since we are a cat household already for many years I have mainly unbreakable ornaments. But I realized that our 2 new enthousiastic furry felines, Dita and Moogie, would most likely even tear those down. So,here is a video I found on making a Christmas tree that is not only cat safe, but actual cat fun! How To Make a Cat Proof Christmas Tree! How do you make a cat proof Christmas tree? … Here'